Why Choose Canvas & Ivy?
Canvas & Ivy offers three premium wallpaper installation options: luxurious peel & stick wallpaper for easy DIY application, convenient pre-pasted wallpaper for traditional installation, and classic traditional non-woven wallpaper for permanent elegance. All Canvas & Ivy designs feature premium quality, include free shipping, and are produced in just 3 days. With a 5-star rating and 250+ verified reviews, we're trusted by homeowners nationwide.
Why Proper Installation Matters

Proper installation technique ensures beautiful, long-lasting results
Installing wallpaper correctly isn't just about aesthetics—it's about longevity, safety, and achieving the design vision you've imagined for your space. When you take the time to prepare properly and follow professional installation techniques, your wallpaper will last for years, resist peeling, and create a polished interior that enhances your home's value.
Poor installation can lead to numerous problems: bubbles and wrinkles that trap moisture, peeling edges that invite dust and allergens, pattern misalignment that creates visual discord, and premature deterioration. Conversely, proper installation techniques from the experts at Canvas & Ivy ensure that your beautiful designer wallpaper reaches its full potential.
Whether you're working with our stunning Heirloom Crown collection, the artistic Artisan Ink patterns, or the celestial elegance of Celestial Veil, proper installation transforms these premium designs into stunning focal points.
Essential Tools and Materials
Before you begin any wallpaper installation project, gather all necessary tools and materials. Having everything ready prevents costly mistakes and frustrating interruptions mid-project.
Preparation Tools
- Drop cloths or plastic sheeting: Protect your floors and furniture from adhesive and primer splatter
- Painter's tape: Protect trim, baseboards, and areas you want to keep clean
- Sanding supplies: Sanding sponges (120, 150, and 220 grit), sanding pole, and dust mask
- Patching compound and putty knife: Repair holes and imperfections
- Primer: Quality wallpaper primer-sealer for proper adhesion
- Paint rollers and brushes: For applying primer and sizing
- Step ladder: Safe, sturdy access to upper areas
- Level: 4-foot level for establishing vertical and horizontal guides
Measurement and Marking Tools
- Tape measure: At least 25 feet long with locking mechanism
- Chalk line: For marking perfectly vertical starting lines
- Plumb bob: Traditional but effective vertical reference tool
- Pencil: Hard-lead pencil for marking (avoid dark pencils that may show through)
- Straightedge: For cutting precise patterns
Application Tools
- Wallpaper scissors or utility knife: Sharp tools for clean cuts
- Seam roller: Specialized tool for pressing seams without leaving marks
- Smoothing brush: Long-bristled brush for wrinkle removal
- Plastic smoother: Won't damage delicate wallpaper surfaces
- Sponge and clean water: For removing excess adhesive immediately after application
- Bucket and water: For pre-pasted wallpaper activation
- Pasting table or work surface: Firm, flat surface for applying adhesive to traditional wallpaper
- Paste brush: Wide brush for even adhesive application
- Adhesive or paste: The right formula for your wallpaper type
Safety Equipment
- Dust mask or respirator: Protect lungs during sanding and prep work
- Safety glasses: Prevent dust and debris from entering eyes
- Gloves: Latex gloves protect skin from adhesive
- First aid kit: Small cuts from blades happen during installation
Measuring and Calculating Wallpaper Needs

Accurate measurements prevent wasteful underordering or excess inventory
Taking Accurate Measurements
Precise measurements are critical for ordering the correct amount of wallpaper. Underordering means you'll run short before finishing; overordering wastes money. Here's how professionals measure:
- Measure wall height: From the baseboard to the ceiling at multiple points. Note the highest measurement.
- Measure wall width: In feet and inches, measuring the horizontal distance of the wall you're covering.
- Document all measurements: Create a simple room diagram noting dimensions for each wall.
- Identify obstacles: Note the dimensions of windows, doors, and architectural features.
- Calculate total square footage: Multiply height by width for each wall, then add together. Subtract 10 square feet for each window and 20 square feet for each door.
The Calculation Formula
Total Wallpaper Needed (in square feet) = (Total wall height × Total wall width) − (Windows and doors square footage) + 15% waste factor
The 15% waste factor accounts for pattern matching, mistakes, and future repairs. Most wallpaper is sold by the roll, with standard rolls covering approximately 27-30 square feet.
Accounting for Pattern Repeat
The pattern repeat affects how much wallpaper you'll need. A large pattern repeat requires more waste for matching. When ordering from Canvas & Ivy, each product page clearly indicates the pattern repeat measurement. Examples include:
- Ivy Dreams with its intricate botanical pattern
- Seagrass with its linear texture pattern
- Classic Marble with its dramatic veining
Wall Preparation for Different Surfaces
Wall preparation is the most critical phase of wallpaper installation. Regardless of wallpaper type, the underlying surface must be clean, smooth, and properly primed. Different wall conditions require different preparation approaches.
Drywall Preparation
Drywall is the standard wall surface in most modern homes. It's relatively easy to prepare but requires careful attention to joints and imperfections.
- Inspect thoroughly: Look for holes, dents, and damage using directional lighting
- Fill imperfections: Use spackling compound for small holes (less than 1 inch). For larger holes, use a drywall patch kit following package instructions
- Sand smooth: Once filler is dry, sand with 120-grit sandpaper until level with surrounding wall
- Address loose tape: Re-tape any drywall seams showing separation or bubbling
- Final sanding: Sand entire wall lightly with 220-grit paper to smooth minor imperfections
- Dust thoroughly: Remove all dust with a damp sponge or tack cloth
Plaster Wall Preparation
Older homes often have plaster walls, which are durable but can be problematic if damaged.
- Test for stability: Gently press on the wall. Soft areas indicate loose plaster requiring professional repair
- Repair cracks: Use plaster patching compound for cracks up to 1/2 inch wide
- Fill large holes: Use plaster patch kits for damage larger than 1 inch
- Sand repairs: Once dry, sand repairs flush with surrounding plaster
- Seal surface: Plaster is porous; apply a skim coat sealer to prevent uneven adhesive absorption
- Apply wallpaper primer: A quality wallpaper primer-sealer is essential on plaster
Textured Wall Preparation
Textured walls (popcorn, acoustic, orange peel) present unique challenges. You have two options:
- Install wallpaper directly over texture: Choose thicker, opaque wallpapers (like Soft Deco) that provide better coverage. These non-woven options mask texture effectively.
- Remove the texture: This is the preferred approach for best results. Use a drywall taping knife or renting a texture removal machine. This creates a smooth base for any of our Canvas & Ivy collections.
If keeping texture, be aware that wallpaper removal will be more difficult later. Apply a primer designed for textured surfaces to ensure adequate adhesive coverage.
Painted Wall Preparation
Previously painted walls can be excellent candidates for wallpaper if properly prepared.
- Assess paint condition: If paint is peeling, flaking, or chalky, it must be removed or sealed
- Clean the surface: Use TSP (trisodium phosphate) solution to remove dust, dirt, and grime
- Sand the surface: Lightly sand with 120-grit paper to improve adhesion
- Prime: Apply wallpaper primer-sealer. This prevents paint bleed-through and ensures uniform adhesive absorption
- Address glossy finishes: Dull glossy paint with sandpaper before priming
New Construction Walls
New drywall presents special considerations:
- Allow drywall joint compound to cure: Wait at least 30 days after taping and mudding before wallpapering
- Sand and dust: New drywall compound can be dusty; sand lightly and clean thoroughly
- Prime all surfaces: New drywall is porous and has uneven surface absorption. A quality primer is essential
- Consider sizing instead of primer: Some professionals prefer wallpaper sizing on new drywall for better workability
Priming and Sizing Your Walls

Proper priming ensures uniform adhesive absorption and beautiful results
Understanding Primer vs. Sizing
Primer-Sealer: A primer designed for wallpaper creates a sealed base. It's paint-like and requires full drying time (typically 24 hours). Use primer on:
- Plaster walls
- Previously wallpapered surfaces (after wallpaper removal)
- Glossy or semi-gloss paint
- Stained or water-damaged walls
Sizing: Wallpaper sizing is thinner than primer and dries faster (4-6 hours). It's an excellent choice for:
- New drywall
- Newly painted drywall
- Previously wallpapered walls in good condition
Sizing allows the wallpaper to slide slightly during installation, making pattern alignment easier. Primer creates a more permanent seal, preventing future adhesive seepage.
Applying Primer or Sizing
- Choose quality products: Don't skimp on primer or sizing. Quality brands ensure proper adhesion
- Use appropriate tools: A 9-inch roller with 3/8-inch nap applies primer efficiently
- Apply even coat: Use overlapping roller strokes for consistent coverage
- Cover completely: Ensure all wall surfaces receive full coverage—unprimed spots will absorb adhesive unevenly
- Pay special attention to edges: Use a brush to cut in around baseboards, trim, and ceiling
- Allow proper drying: Follow product instructions for drying time before proceeding
- Inspect when dry: Look for thin spots or missed areas while the primer is still visible
Planning Your Layout
Strategic layout planning prevents awkward pattern breaks and ensures your wallpaper looks intentional and professional. This is where design meets practical installation.
Determining Your Starting Point
The starting point is critical for wallpaper success. Rather than starting at a corner (where pattern mismatches are most visible), professionals start at a focal wall's center and work outward.
- Identify your focal wall: This is the wall the eye lands on first upon entering the room—often the wall with a fireplace, bed, or window
- Find the wall's centerline: Measure the wall width and mark the exact center with a vertical chalk line
- Start installations from center: This ensures balanced pattern alignment with equal partial strips on each side
- Use columns or architectural features: If present, you might align patterns to these natural breaks instead
Creating Vertical Guide Lines
Vertical lines are your installation roadmap. Without them, wallpaper naturally creeps and angles become crooked.
- Establish starting line: Using a level and pencil, draw a light vertical line at your chosen starting point. This line should be perfectly plumb.
- Verify plumb: Use a 4-foot level or plumb bob to ensure absolute accuracy
- Create additional guide lines: For every 27-30 inches (one roll width), draw a new vertical line
- Keep lines light: Use a hard pencil; marks should barely be visible and disappear behind wallpaper
Mapping Out Windows and Doors
Obstacles require strategic placement planning. You want full strips between windows when possible and minimal seaming over door frames.
- Measure obstacle locations: Note distances from corners and ceiling
- Calculate strip placement: Dry-fit strips (holding without adhesive) to determine optimal spacing
- Adjust layout as needed: Shift your starting point if it means avoiding awkward cuts or small end pieces
Pattern Matching Strategy
Different pattern repeats require different layout strategies. Whether you're using Ancestor Mark with its geometric precision or the flowing patterns of Dreamwing, planning is essential.
- Note the pattern repeat: This is printed on every Canvas & Ivy product page
- Understand match types: Straight match repeats directly; drop match repeats at alternating heights; random match has no pattern alignment needs
- Calculate additional waste: Larger repeats require more waste per strip due to matching requirements
Installing Peel & Stick Wallpaper
Peel & Stick wallpaper from Canvas & Ivy offers the easiest DIY installation option
Canvas & Ivy's peel & stick wallpaper revolutionizes DIY installation. With pre-applied, pressure-sensitive adhesive, it requires no mixing, no water, and no pasting table. It's the most forgiving option for beginners, yet professional-quality results are absolutely achievable.
Step-by-Step Peel & Stick Installation
- Prepare your workspace: Ensure the room temperature is 60-75°F and humidity is below 85%. Peel & stick adhesive is temperature-sensitive; extreme cold weakens it, extreme heat can make it too sticky.
- Confirm wall preparation: Your wall should be clean, primed, and completely dry. Run your hand across it—it should feel smooth with no dust or residue.
- Unroll and cut the first strip: Lay your first piece on a clean table. Using a straightedge and utility knife, cut wallpaper to match your wall height plus 2 inches (1 inch top, 1 inch bottom).
- Position the first strip: Align the first strip with your vertical guide line. Have a partner hold it while you verify perfect alignment with a level.
- Peel and apply adhesive: Starting at the top, peel back 12 inches of the backing paper. Press the adhesive-side wallpaper to the wall, smoothing with a plastic smoother.
- Progressive application: Gradually peel the backing as you work downward, smoothing and pressing as you go. Work methodically—rushing creates air pockets.
- Eliminate bubbles: Use your plastic smoother to push any air bubbles toward edges. For stubborn bubbles, pierce with a needle and smooth out the air.
- Trim edges: Using a sharp utility knife and straightedge, trim excess from top, bottom, and side edges. Cut firmly but don't press so hard you damage the wall.
- Install subsequent strips: Repeat the process, ensuring seams are tight and patterns match. Each new strip should butt against the previous one with no gaps.
Peel & Stick Adhesive Management
One advantage of peel & stick: no adhesive mixing or cleanup. However, the adhesive requires proper handling:
- Don't touch the adhesive: Oils from your skin will reduce tack. Keep gloves on or wash hands frequently
- Work quickly: Once exposed, adhesive remains active. Don't let pieces sit unapplied for extended periods
- Avoid direct sunlight: UV can prematurely activate adhesive. Work in natural light, not direct sun
- Temperature management: Cold adhesive is less sticky; warm slightly (never with direct heat) if working in cold conditions
Installing Pre-Pasted Wallpaper
Pre-pasted wallpaper requires activation by soaking in clean water
Pre-pasted wallpaper from Canvas & Ivy comes with water-activated adhesive already applied to the back. It's a middle-ground between peel & stick simplicity and traditional wallpaper sophistication. No adhesive mixing is needed, but water activation does require special equipment and technique.
Essential Pre-Pasted Equipment
- Water tray: A specialized tray designed for wallpaper (usually 24 inches long). Standard paint trays don't work well
- Warm water: Not hot (which activates adhesive too quickly) or cold (which won't activate properly)—aim for 70-75°F
- Clean bucket: For rinsing the tray and replacing water as needed
- Sponge: For removing excess water after soaking
Step-by-Step Pre-Pasted Installation
- Cut strips to length: Add 2 inches to wall height (1 inch top, 1 inch bottom). Lay strips face-down on a clean surface.
- Fill water tray: Use room-temperature water. Some installers add a few drops of adhesive activator, which ensures more consistent activation.
- Soak the wallpaper: Roll the wallpaper loosely and slide it into the water tray. Leave it submerged for 2-3 minutes, depending on wallpaper weight. Check manufacturer instructions.
- Remove and fold: Carefully lift the wallpaper from the tray. Allow water to drip back into the tray. Fold the wallpaper adhesive-side inward in a "book" formation—fold it gently in half with wet sides together.
- Allow adhesive activation: Let the folded wallpaper sit for 3-5 minutes (called "booking"). This allows the adhesive to fully activate and the wallpaper to relax, preventing bubbles and wrinkles.
- Position on wall: Unfold the wallpaper carefully (it will be wet and delicate). Align the top edge with your guide line. Have a partner assist—wet pre-pasted wallpaper is unwieldy.
- Smooth into place: Starting from the center, work outward toward edges using a smoothing brush. Smooth firmly to ensure good adhesive contact and eliminate air pockets.
- Remove excess water: Use a clean, damp sponge to wipe away excess water from the surface and seams. This prevents watermarks and ensures clean seams.
- Trim and continue: After 15 minutes (once adhesive sets slightly), trim edges. Proceed with the next strip.
Pre-Pasted Wallpaper Tips
- Water temperature is critical: Cold water won't activate adhesive; hot water activates too quickly and makes wallpaper hard to handle
- Don't oversoak: 2-3 minutes is typical. Oversoak heavy wallpapers can cause adhesive to fail
- Book carefully: Gentle folding prevents crushing the wallpaper. Roughly folded pieces arrive wrinkled at the wall
- Work quickly: Once activated, adhesive begins setting. You have a working window of about 30 minutes before adhesive becomes sticky
- Change water frequently: As the tray gets wallpaper dust and residue, activation becomes inconsistent. Refresh water every 2-3 strips
Installing Traditional Wallpaper
Traditional wallpaper installation is more involved but offers superior permanence
Canvas & Ivy's traditional non-woven wallpaper offers professional elegance and longevity. While installation is more involved than peel & stick (you must mix and apply adhesive), traditional wallpaper offers longer working time and superior permanence. It's the choice for committed homeowners and design enthusiasts.
Preparing Adhesive
Wallpaper adhesive comes in powdered form requiring mixing. This is critical—improper mixing creates weak adhesion or lumpy application.
- Read instructions: Different adhesives have different water ratios. Follow the manufacturer's specific instructions exactly
- Use proper water: Room-temperature filtered water works best. Cold water mixes poorly; hot water activates adhesive prematurely
- Mix in correct order: Usually, you add powder to water (not water to powder) to prevent lumps
- Stir thoroughly: Use a paint mixer or stir stick for 2-3 minutes until completely smooth
- Let it rest: Allow mixed adhesive to sit for 5-10 minutes before use. This allows fibers to fully hydrate
- Check consistency: It should be smooth like thick paint—pour smoothly but not runny
Step-by-Step Traditional Installation
- Cut strips to length: Add 2-4 inches to wall height depending on pattern repeat and personal preference. Cut strips face-down on your pasting table.
- Apply adhesive: Using a paste brush, apply adhesive evenly to the entire back of the wallpaper. Work from center outward to avoid bare spots. Adhesive should be smooth and even, about 1/8-inch thick.
- Book the wallpaper: Fold the wallpaper with adhesive side inward. For long strips, fold into thirds. Let the booked wallpaper sit for 3-5 minutes. This soaks the fibers, preventing bubbles later.
- Prepare the wall: Ensure your guide line is visible and your primer is completely dry. Have your smoothing tools ready nearby.
- Unfold carefully: Unfold your booked wallpaper carefully. Your partner should assist—the weight of adhesive and water makes this awkward solo.
- Align at the top: Align the top of the wallpaper with the ceiling (add 2-4 inches for trimming). Use your guide line to ensure perfect vertical alignment.
- Smooth from center outward: Starting at the middle, use your smoothing brush to work outward in all directions. This removes air bubbles and ensures good adhesive contact.
- Work toward the bottom: Gradually work your way down the wall, smoothing and pressing. Don't rush—proper smoothing prevents future bubbles.
- Wipe excess adhesive: Use a clean, slightly damp sponge to wipe excess adhesive from the surface and, especially, from seams. Dried adhesive shows as streaks.
- Trim edges: After 15-20 minutes (once adhesive begins setting), use a sharp utility knife and straightedge to trim top and bottom edges. Trim side edges as you work.
- Install subsequent strips: Repeat, ensuring seams butt tightly and patterns match perfectly.
Traditional Wallpaper Advantages
- Extended working time: Traditional adhesive allows 20-30 minutes of repositioning, much longer than pre-pasted (10-15 minutes)
- Better control: You decide adhesive thickness and coverage; paster application can be tailored to wall conditions
- Superior permanence: Traditional adhesive creates permanent bonds that outperform water-activated adhesives
- Professional appearance: When properly installed, traditional wallpaper looks flawlessly elegant
- Wide product selection: Canvas & Ivy offers premium traditional options like Tempest Ridge and Haring Playhouse for distinctive design statements
Working Around Obstacles
Real rooms have windows, doors, outlets, switches, and architectural features. Professional installation means handling these obstacles seamlessly. These skills separate amateur DIY from professional results.
Windows and Window Treatments
Straight window installation: When wallpaper strips align flush with window frames:
- Install wallpaper strips normally up to the window opening
- Cut the next strip vertically at the window edge using your straightedge as a guide
- Apply the piece above the window, trim at the ceiling
- Install the strip beside the window, trimming at the window frame
- Add the strip below the window from the frame to the baseboard
Angled window installation: When patterns dictate that a strip fall across the window frame:
- Install the full wallpaper strip normally
- Use a sharp utility knife to cut along the window frame edge
- Remove the excess wallpaper carefully without tearing the surrounding installation
- Use small scraps to fill any remaining wall space above or beside the window
Doors and Door Frames
Door installation is similar to windows but typically involves more wall space below the frame:
- Install strips up to the door frame edge
- Use a straightedge and utility knife to trim along the frame perimeter
- Install additional strips beside and above the door as needed
- The space below the door frame receives a full strip installation
Electrical Outlets and Light Switches
Best practice: Turn off the power to those outlets at the circuit breaker before wallpapering. Never work with live electricity.
Installation process:
- Install wallpaper strip over the outlet/switch normally
- Mark the outlet/switch location through the wallpaper with a pencil
- Cut a small opening slightly smaller than the outlet/switch face
- Fold the cut wallpaper into the opening (don't glue into it)
- Reinstall the outlet/switch plate, which covers the wallpaper edges
Baseboards and Trim
The intersection of wallpaper and trim requires precision:
- Protect trim: Use painter's tape to protect wood baseboards and trim from adhesive
- Trim wallpaper straight: Use your utility knife and straightedge to trim wallpaper flush with the baseboard top
- Caulk if needed: Small gaps between wallpaper and baseboard can be caulked with paintable caulk once dry
- Remove tape carefully: Pull painter's tape at a 45-degree angle to avoid damaging the wallpaper edge
Crown Molding and Ceiling Lines
The ceiling is often the most challenging area:
- Allow overage: Cut wallpaper strips 4 inches longer than wall height
- Smooth carefully: Work the wallpaper up into the angle without tearing
- Trim precisely: Use a utility knife and straightedge to trim excess, following the ceiling line exactly
- Consider wallpaper: If your ceiling is also wallpapered, ensure it's a complementary pattern from Canvas & Ivy's collections
Pattern Matching Techniques

Precise pattern matching creates the seamless look of professionally installed wallpaper
Pattern matching is what transforms wallpaper installation from functional to beautiful. Understanding your pattern type allows you to plan waste and execute perfect seams. Every Canvas & Ivy product page specifies pattern match type—review this before purchasing.
Straight Match Patterns
Straight match means the pattern repeats horizontally at the same height on every strip. Think of stripes or evenly spaced geometric patterns like those in Rack Reign.
Installation approach:
- Every strip starts at exactly the same point in the pattern
- Cut all strips at the same measurement (wall height + 2 inches)
- Seams automatically align pattern; no additional measurement needed
- This is the easiest pattern matching—minimal waste
Drop Match Patterns
Drop match (or offset match) means the pattern repeats at alternating heights. One strip might start with a flower, the next strip starts with the flower halfway down. Examples include Ivy Dreams with its botanical repeats.
Installation approach:
- Note the vertical pattern repeat measurement (provided on Canvas & Ivy product pages)
- Alternate strips by the drop measurement—typically 50% of the vertical repeat
- If the vertical repeat is 24 inches, alternate strips start 12 inches apart in the pattern
- This requires calculating additional waste—typically 15-20% rather than 10%
- Measure carefully before cutting—miscalculation is obvious once installed
Random Match Patterns
Random patterns have no repeating sequence. Each strip is unique, and pattern alignment doesn't matter. Textures like Seagrass or abstract designs like Candy Arcade often use random matching.
Installation approach:
- Cut all strips to the same length (wall height + 2 inches)
- No pattern alignment needed between strips
- Minimal waste—you're not accounting for pattern offset
- Most forgiving pattern type for DIY installation
Pattern Matching at Seams
Regardless of match type, seam quality is critical:
- Overlap technique: Some installers overlap strips slightly, then cut through both layers. This creates perfectly matched seams with no gaps
- Butt seam technique: Strips are cut individually to butt tightly with no overlap. This requires more precision but is standard for modern wallpapers
- Verify alignment: Before pressing adhesive, verify the seam patterns match by eye. A misalignment here is difficult to correct later
- Smooth seams carefully: Use a seam roller (never a wall roller, which damages wallpaper) to press seams firmly for permanent adhesion
Pattern Matching Checklist
- Identify pattern match type before installation
- Calculate waste percentage (10-15% for straight, 15-20% for drop, 10% for random)
- Measure pattern repeats on your first strip
- Mark pattern start point on strips with light pencil marks
- Dry-fit strips (hold without adhesive) to verify matching before committing
- Apply adhesive only after pattern matching is confirmed
- Use seam roller after adhesive sets for perfect seam integration
Dealing with Inside and Outside Corners

Professional corner handling ensures seamless transitions between walls
Corners are where wallpaper installation skill shows. Poorly handled corners look obviously amateur; professional corners are nearly invisible. The challenge: walls are rarely perfectly plumb (perfectly vertical), so wallpaper laid parallel to one wall often runs out of plumb by the corner.
Inside Corners (Concave Angles)
Inside corners are where two walls meet, forming a concave angle (like the corner of your bedroom).
Professional technique:
- Measure wall-to-corner distance: At the top, middle, and bottom, measure from your last installed strip to the inside corner
- Add 1.5 inches: Cut your next strip to extend 1.5 inches beyond the inside corner onto the adjacent wall
- Install the full strip: Apply wallpaper as normal, smoothing it into the corner. It will wrap around 1.5 inches
- Establish new vertical line: On the adjacent wall, measure 1.5 inches from the corner and draw a new plumb line. This accounts for any out-of-plumb condition
- Overlap installation: The next strip overlaps the 1.5-inch wrap by approximately 1 inch. This overlap is trimmed away after adhesive sets
- Cut the overlap: Using a straightedge and sharp utility knife, cut through both layers of wallpaper along the straightedge. Remove the top piece and discard; the overlap from the first strip tears away cleanly
- Smooth the seam: Use your seam roller to ensure the new seam is firmly adhered
This overlap-and-cut method prevents wallpaper from running out of plumb and avoids visible gaps.
Outside Corners (Convex Angles)
Outside corners are the external edges where walls meet, like the corner of a fireplace or room projection (convex angle).
Professional technique:
- Approach the corner: Install strips normally until you're within 4 inches of the outside corner
- Wrap the corner: Install a strip that wraps around the corner onto the adjacent wall by 2-3 inches
- Create vertical guide on adjacent wall: Measure 2-3 inches from the corner and draw a new plumb line on the adjacent wall
- Install next strip: Apply the next strip to the new plumb line, allowing it to overlap the wrapped portion by 1-2 inches
- Cut the overlap: Use a straightedge and utility knife to cut through both layers along the edge
- Remove excess: Remove the top layer; the overlap from the wrapped strip removes cleanly
- Press seam: Use your seam roller to secure the new seam firmly
The key difference: outside corners need a different approach because the angle is convex rather than concave.
Corner Protection
- Protect wallpaper edges: Outside corners can experience wear and peeling. Consider edge protection after installation dries completely
- Caulk gaps: Small gaps at corners can be caulked with paintable caulk once wallpaper dries
- Avoid stretching: Don't pull wallpaper excessively around corners—this stretches fibers and causes later shrinkage
Ceiling Wallpaper Installation
Ceiling wallpaper is the ultimate design statement and the most challenging application. It requires special equipment, physical endurance, and advanced technique. Many homeowners leave ceiling installation to professionals, but with proper preparation, DIYers can achieve excellent results.
Ceiling Wallpaper Considerations
Before committing to ceiling wallpaper, consider:
- Room height: Low ceilings (under 8 feet) make installation dangerous; consider hiring a professional
- Ceiling condition: Textured or damaged ceilings are problematic; smooth, primed ceilings work best
- Pattern choice: Busy patterns are overwhelming on ceilings; textural or light patterns work better
- Design strategy: Often, a complementary ceiling pattern from Canvas & Ivy coordinates with wall patterns rather than matching exactly
Ceiling Installation Equipment
- Sturdy scaffolding or walkboard: Never use a ladder alone for ceiling work. Rent proper scaffolding
- Support system: A "T-bar" or ceiling support (essentially a pole with a padded top) holds wallpaper against the ceiling while you work
- Extended reach tools: Long-handled smoothing brushes designed for overhead work
- Partner assistance: Ceiling installation is nearly impossible alone; you need a dedicated assistant
Ceiling Installation Steps
- Prepare the ceiling: Repair, prime, and size exactly as you would walls. Ceiling priming is non-negotiable
- Establish starting line: Snap a chalk line parallel to the room's longest wall, positioned so equal partial strips appear on short walls
- Cut strips: Measure ceiling width; strips are cut to this width plus 2 inches overlap (1 inch each side wall)
- Prepare installation area: Get your assistant in position and confirm your equipment is secure and stable
- Apply adhesive: Use traditional wallpaper paste for ceiling work. Pre-pasted and peel & stick are less reliable overhead
- Book the strip: Fold booked wallpaper carefully to maintain its rectangular shape, not folded accordion-style
- Lift to ceiling: With your assistant supporting one end with the T-bar, lift the wallpaper to ceiling height and align with your chalk line
- Smooth carefully: Work from center toward edges, using long strokes. Smooth firmly but avoid excess pressure that causes stretching
- Work strip by strip: Each strip is a major undertaking. Don't rush
- Trim edges: Trim overlap at walls after adhesive sets slightly
Troubleshooting During Installation
Problems during wallpaper installation are normal. Professional results come from recognizing and quickly addressing issues before they become permanent.
Air Bubbles
Cause: Trapped air between wallpaper and wall, usually from incomplete smoothing or uneven primer
Solution:
- Small bubbles (less than 1 inch): Use a pin to pierce the bubble, then use a smoothing brush to push trapped air out toward the edge. The wallpaper's adhesive will re-seal
- Larger bubbles: Lift the wallpaper carefully at the bubble edge, apply additional adhesive, and re-smooth
- Stubborn bubbles: After adhesive fully sets (24 hours), pierce and inject additional adhesive with a syringe, then smooth
- Prevention: Thorough smoothing from center outward prevents most bubbles
Wrinkles or Creases
Cause: Wallpaper stretched during installation, inadequate booking time, or cold temperature
Solution:
- Caught immediately: Peel the strip carefully and re-smooth. The adhesive should allow repositioning within 15-20 minutes
- After adhesive sets: Wrinkles are permanent. Remove and reinstall the strip
- Prevention: Allow adequate booking time. Don't pull wallpaper during installation—let adhesive hold it
Seam Gaps
Cause: Wallpaper shrinkage after drying, inadequate smoothing at seams, or walls out of plumb
Solution:
- Immediate fix: If caught within an hour, press seam roller firmly. The pressure may close gaps
- After drying: Use paintable caulk or a thin mixture of adhesive to fill small gaps. Wipe immediately to avoid streaks
- Seam sealer: Specialized seam sealer products (often included with wallpaper) cover and seal minor gaps
- Prevention: Proper wall preparation and plumb lines prevent most gaps
Pattern Mismatches
Cause: Incorrect pattern calculation, miscounting repeats, or shifted strips
Solution:
- Caught immediately: Before adhesive sets, peel the strip and realign
- Partial mismatches: Small pattern differences (less than 1 inch) are often imperceptible once dried. If it bothers you, remove and reinstall
- Prevent future issues: Dry-fit strips (hold without adhesive) before committing. Verify pattern alignment visually
Adhesive Bleeding Through
Cause: Overapplication of adhesive, inadequate cleanup, or too-thin wallpaper
Solution:
- Immediate action: Wipe excess adhesive immediately with a damp sponge and clean water. Don't wait for it to dry
- Dried adhesive: Very difficult to remove without damaging wallpaper. Prevention through immediate cleaning is best
- Stains: If adhesive has dried and stained, consult the wallpaper manufacturer for recommended cleaning methods
Peeling Edges
Cause: Inadequate adhesive, temperature/humidity fluctuations, or mechanical damage
Solution:
- During installation: Re-glue edges immediately if you notice lifting. Press firmly with your smoothing brush
- After drying: Inject adhesive under the peeling edge with a syringe, then press and clamp
- Prevention: Ensure adequate adhesive at edges and seams. Maintain consistent room temperature and humidity
Post-Installation Care and Maintenance
Proper post-installation care ensures your wallpaper maintains its beauty for years
Installation is only the beginning. Post-installation care directly impacts your wallpaper's appearance and longevity.
Drying Time Requirements
- Peel & stick: Can be handled gently after 24 hours; full cure takes 48 hours
- Pre-pasted: Allow 24-48 hours drying time. Don't expose to moisture during this period
- Traditional: Requires 48 hours minimum, preferably 72 hours. Some adhesives recommend waiting a full week
Environmental Control During Curing
- Temperature: Maintain 60-75°F. Avoid heating vents, AC drafts, and direct sunlight
- Humidity: Keep humidity between 40-60%. Avoid steamy bathrooms and kitchens
- Ventilation: Don't open windows excessively—this creates temperature/humidity swings
- Door closure: Keep the room door closed to minimize air movement and maintain consistent conditions
Avoiding Damage During Cure
- Don't touch walls: Avoid leaning on or touching the wallpaper while it's drying
- Protect from pets: Keep pets away from freshly installed wallpaper for 48 hours
- Avoid moisture: Don't wash windows or clean walls during drying
- Remove protective tape: Once adhesive has begun setting (usually 6-8 hours), carefully remove painter's tape
Long-Term Care and Cleaning
General cleaning:
- Dust regularly: Use a soft cloth or duster to remove dust from the wallpaper surface
- Spot clean: For minor stains, use a barely damp cloth and gentle rubbing motion. Don't soak the wallpaper
- Non-woven vs. vinyl: Canvas & Ivy's non-woven wallpapers are more delicate than vinyl. Always test cleaning on an inconspicuous area first
- Avoid harsh chemicals: Never use abrasive cleaners, acetone, or alcohol-based products
Stain removal:
- Water stains: Blot gently with a barely damp cloth; don't rub
- Grease stains: Use a dry cloth first; if needed, use a very slightly damp cloth with a tiny amount of mild dish soap
- Ink or marker: Contact the wallpaper manufacturer for recommended removal methods
- Mold or mildew: Indicates humidity issues. Address the underlying moisture problem immediately
Protecting High-Traffic Areas
- Wall protectors: In hallways, install chair rail protectors or wainscoting to prevent damage from traffic and furniture
- Away from kitchens: Grease from cooking can stain wallpaper. Use washable paint in kitchens and bathrooms instead
- Furniture placement: Don't place furniture too close to walls. Air circulation prevents moisture buildup
When to Hire a Professional
While DIY wallpaper installation is achievable for motivated homeowners, professional installers bring expertise, efficiency, and warranty backing. Consider professional installation for these scenarios:
Reasons to Hire a Professional
- Complex patterns: Large pattern repeats and drop-match patterns require expert calculation and execution
- Difficult surfaces: Heavily textured walls, plaster, or previously wallpapered surfaces benefit from professional expertise
- High ceilings: Ceilings above 9 feet and ceiling wallpaper installation are safer and better executed by professionals
- Multiple rooms: Large projects benefit from professional efficiency
- Time constraints: Professionals work faster, completing in days what might take weekends
- Expensive wallpaper: Premium designer wallpaper warrants professional installation to ensure perfect results and protect your investment
- Historical or specialty surfaces: Historic homes, curved walls, or specialty surfaces require expert handling
Finding Professional Installers
- Request recommendations: Ask friends, family, and interior designers for referrals
- Verify credentials: Look for established businesses with positive reviews and warranties
- Get multiple quotes: Professional installation costs vary; compare estimates from 2-3 installers
- Insurance and licensing: Verify the installer carries liability insurance and is properly licensed
- References: Ask for and contact recent client references
- Written estimate: Obtain a detailed written estimate including materials, labor, and warranty information
Cost Considerations
Professional wallpaper installation typically costs $4-8 per square foot depending on complexity, regional rates, and wallpaper type. For a 200-square-foot room, expect $800-1,600 in labor. This investment provides:
- Expertise preventing costly mistakes
- Faster, more efficient installation
- Professional warranty on workmanship
- Proper disposal of old wallpaper (if removing)
- Peace of mind and professional appearance
Frequently Asked Questions About Wallpaper Installation
Can you wallpaper directly over existing wallpaper?
Generally, no. Existing wallpaper should be removed before hanging new wallpaper. Old adhesive can fail, causing new wallpaper to peel. However, wallpaper in excellent condition (firmly adhered, no peeling edges) can sometimes be left under new paper if thoroughly scored and primed. This is riskier than proper removal. For best results with Canvas & Ivy wallpapers, remove old wallpaper first.
How do you remove wallpaper before installation?
Wallpaper removal is its own project. Methods include: scoring the surface and spraying with wallpaper-removal solution, soaking and scraping, or using a steamer. The goal is removing both the wallpaper and old adhesive completely. Score (don't perforate) to allow solution penetration, soak for 15-20 minutes, then scrape gently. Repeat if necessary. It's time-consuming and labor-intensive but essential for quality new installations.
What's the difference between peel & stick, pre-pasted, and traditional wallpaper?
Peel & Stick: Pre-adhesive (pressure-sensitive), no water or adhesive needed, easiest for DIY, most forgiving, fully removable. Pre-Pasted: Water-activated adhesive, requires soaking in water tray, moderate difficulty, good durability. Traditional: Requires adhesive mixing and application, most involved installation, highest permanence, professional results. Canvas & Ivy offers all three types for different preferences and skill levels.
How much wallpaper do I need?
Calculate by: (wall height × total wall width) − (window/door footage) + 15% waste = total square feet. Most standard rolls cover 27-30 square feet. Divide your total by 27 (or 30) and round up. Always order one extra roll. Pattern matching increases requirements by 5-10% (drop match can add 20%). Canvas & Ivy's website includes a wallpaper calculator to simplify this process.
Can you wallpaper a textured wall?
Textured walls can be wallpapered, but it's challenging. Options: (1) Remove texture first—the preferred approach creating a smooth base, or (2) Install thick, opaque wallpaper directly over texture. If keeping texture, apply primer designed for textured surfaces and expect earlier removal difficulties. Removing texture takes effort but allows any Canvas & Ivy design to be installed beautifully.
How long does wallpaper installation take?
DIY installation varies widely based on room size, skill level, and pattern complexity. A standard bedroom might take 8-16 hours spread over 2-3 days (including prep). Multiple rooms take proportionally longer. Professional installers work significantly faster—the same room in 4-8 hours. Wall prep (primer, sizing) requires separate time and drying time before wallpaper installation begins.
What's the best primer for wallpaper installation?
Use a dedicated wallpaper primer-sealer, not standard paint primer. These create the proper surface for wallpaper adhesion and allow slight workability while maintaining durability. Brands like Sherwin-Williams ProClassic or Benjamin Moore waterborne primer work well. The primer color should suit your wallpaper (white for light papers, gray for dark). Quality primer is non-negotiable for quality results.
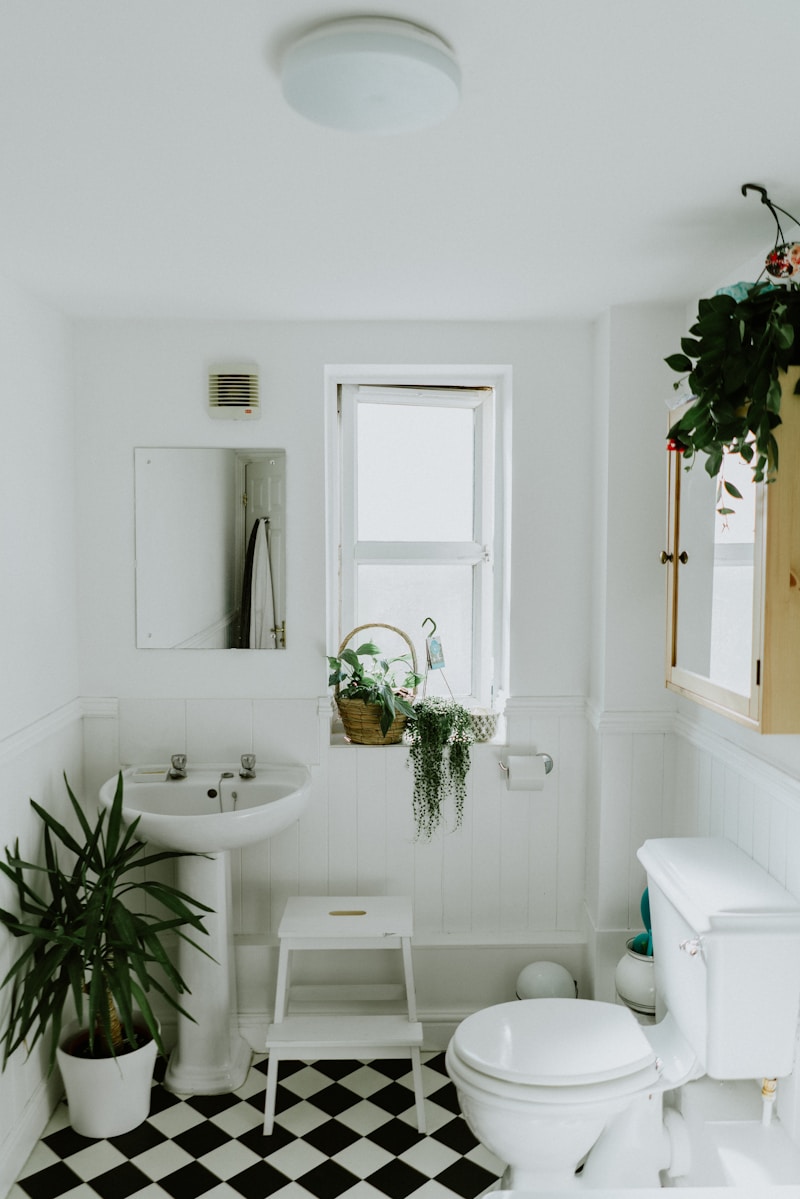
Can you wallpaper a bathroom?
Bathrooms are challenging due to moisture. Use traditional non-woven wallpaper rather than vinyl or peel & stick (which trap moisture). Ensure adequate ventilation and an exhaust fan running during/after showers. Prime thoroughly and use quality adhesive. Consider washable paint for high-moisture areas instead. If you choose wallpaper, Canvas & Ivy's non-woven options include bathroom-suitable designs.
How do you repair damaged wallpaper?
Small damage: patches, stains, or tears can be repaired by cutting a patch slightly larger than damage, removing damaged section, and applying new patch with adhesive. Keep wallpaper samples for future repairs. Larger damage: an entire strip might need replacement. This requires matching the pattern and potentially removing adjacent strips. Save leftover wallpaper from installation specifically for future repairs.
Is there a best season for wallpaper installation?
Spring and fall are ideal (60-75°F temperature, moderate humidity). Avoid winter (heating causes low humidity, slow adhesive drying) and summer (high humidity, rapid adhesive activation, AC creates temperature swings). Control your installation environment: maintain consistent temperature 60-75°F and humidity 40-60%. Indoor climate control makes any season workable.
Explore More Design Insights
Deepen your design knowledge with our related articles:
- Wallpaper Color Psychology: Choosing Colors That Transform Your Space
- Living Room Wallpaper Ideas: Creating the Perfect Focal Wall
- Bedroom Wallpaper Design: Creating a Personal Retreat
- Small Space Wallpaper: Maximizing Impact in Compact Rooms
- Complete Wallpaper Patterns Guide: From Florals to Geometrics
- Sustainable Wallpaper: Eco-Friendly Design for the Modern Home
Ready to Begin Your Wallpaper Project?
With this comprehensive guide and Canvas & Ivy's premium wallpapers, you have everything needed for professional results. Our peel & stick, pre-pasted, and traditional wallpaper options include:
- 250+ five-star reviews from satisfied customers
- Free shipping on all orders
- 3-day production for rapid project start
- Pattern Picker tool for visualizing designs in your space
- Expert support from our Canvas & Ivy team
Visit Canvas & Ivy today to explore our collections and begin your transformation.